前言
在现代网络安全领域,渗透测试工具的选择和使用方式显得尤为关键。PowerShell,作为一种强大的自动化和配置管理工具,不仅仅是系统管理员的利器,同样也是渗透测试者的得力助手。本文将探讨如何利用 PowerShell 的高级功能,如动态函数定义、反射、文件系统监控以及并行处理,来增强渗透测试的效率和效果。
0x01 动态函数定义和执行
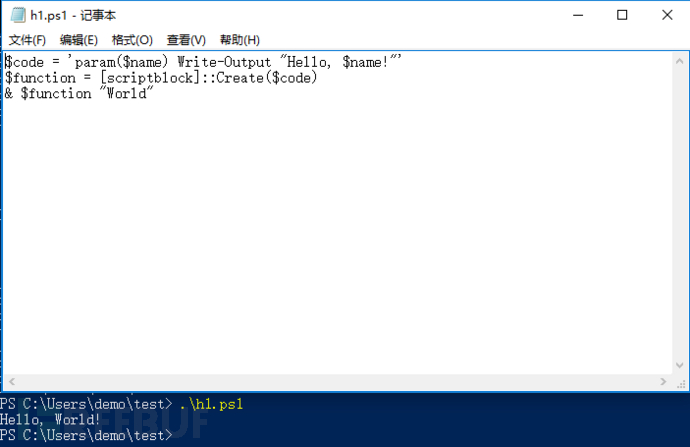
使用 PowerShell 动态创建和执行函数可以使代码更灵活,例如:
$code = 'param($name) Write-Output "Hello, $name!"'
$function = [scriptblock]::Create($code)
& $function "World"
1.定义脚本代码字符串:
$code = 'param($name) Write-Output "Hello, $name!"'
这一行定义了一个字符串$code,其中包含一个 PowerShell 脚本块。这个脚本块接受一个名为$name的参数,并使用Write-Output命令输出一个问候消息。Write-Output通常用来在 PowerShell 控制台输出文本。
2.创建脚本块:
$function = [scriptblock]::Create($code)
这一行使用ScriptBlock类的Create方法将之前定义的字符串$code转换成一个可执行的脚本块(函数)。[scriptblock]是 PowerShell 中用于定义一个代码块的类型,可以包含任意的 PowerShell 代码。这里,$function变量现在存储了一个可执行的脚本块。
3.执行脚本块:
& $function "World"
这一行使用调用操作符&执行之前创建的脚本块$function,并传递参数"World"给这个脚本块。&是 PowerShell 中用于执行脚本块、函数或文件的操作符。这里,它被用来执行$function,并传入"World"作为$name参数的值。
应用场景
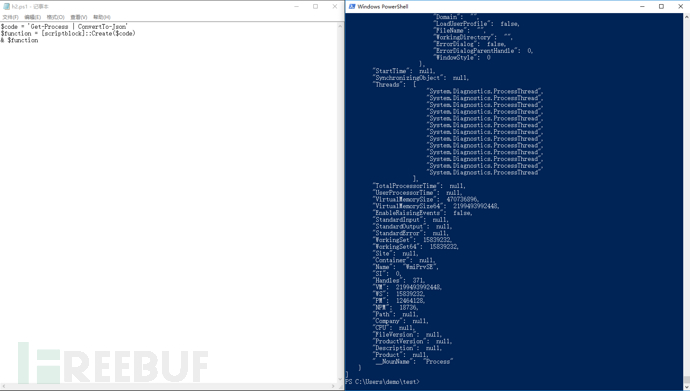
1.信息收集:
$code = 'Get-Process | ConvertTo-Json'
$function = [scriptblock]::Create($code)
& $function
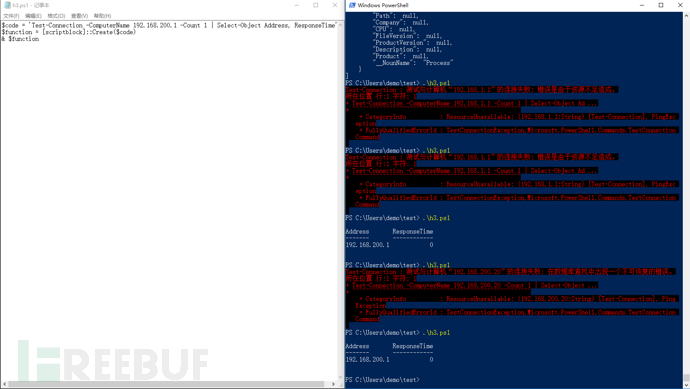
2.网络嗅探:
$code = 'Test-Connection -ComputerName 192.168.1.1 -Count 1 | Select-Object Address, ResponseTime'
$function = [scriptblock]::Create($code)
& $function
0x02反射
使用 .NET 的反射API,可以动态访问和操作程序集,这对于高级脚本编写尤其有用:
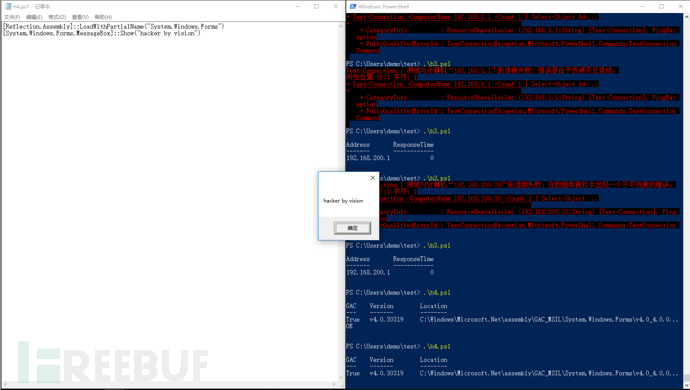
[Reflection.Assembly]::LoadWithPartialName("System.Windows.Forms")
[System.Windows.Forms.MessageBox]::Show("This is a message box!")
1.加载程序集
[Reflection.Assembly]::LoadWithPartialName("System.Windows.Forms")
这行代码使用 .NET 的反射功能中的LoadWithPartialName方法来加载System.Windows.Forms程序集。System.Windows.Forms是一个 .NET 程序集,提供了用于创建 Windows 窗体应用程序的用户界面元素。尽管.LoadWithPartialName()方法已被标记为过时(建议使用Load()),但它在许多脚本中仍被广泛使用以确保兼容性。
2.显示消息框
[System.Windows.Forms.MessageBox]::Show("This is a message box!")
这行代码调用System.Windows.Forms程序集中的MessageBox类的Show静态方法。MessageBox是一个常用于显示简单消息框的类。这里,Show方法被用来显示一个包含文本 "This is a message box!" 的消息框。
Show方法在这里实际上会弹出一个小窗口,显示指定的消息,并等待用户点击 OK 按钮。这种类型的消息框通常用于显示信息、错误、警告或获取用户确认。
应用场景
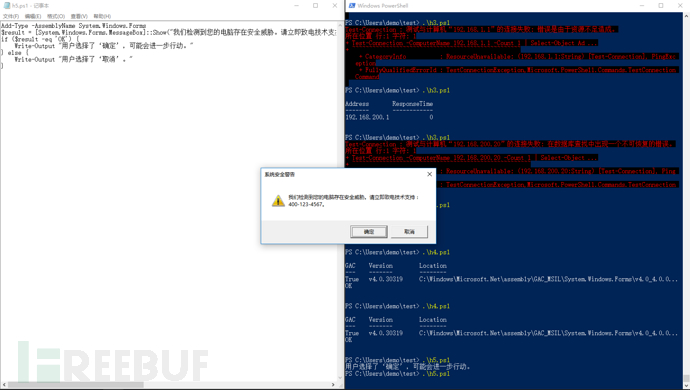
1.虚假警告消息,实现钓鱼
Add-Type -AssemblyName System.Windows.Forms
$result = [System.Windows.Forms.MessageBox]::Show("我们检测到您的电脑存在安全威胁。请立即致电技术支持:400-123-4567。", "系统安全警告", [System.Windows.Forms.MessageBoxButtons]::OKCancel, [System.Windows.Forms.MessageBoxIcon]::Warning)
if ($result -eq 'OK') {
Write-Output "用户选择了‘确定’,可能会进一步行动。"
} else {
Write-Output "用户选择了‘取消’。"
}
0x03深入文件系统事件
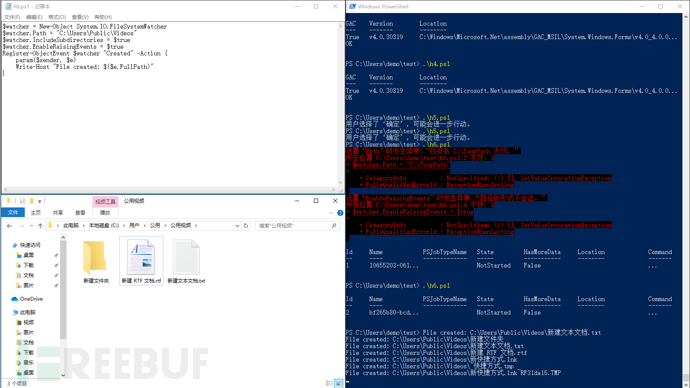
可以监听文件系统的变化,响应文件的创建、修改等事件:
$watcher = New-Object System.IO.FileSystemWatcher
$watcher.Path = "C:\YourPath"
$watcher.IncludeSubdirectories = $true
$watcher.EnableRaisingEvents = $true
Register-ObjectEvent $watcher "Created" -Action {
param($sender, $e)
Write-Host "File created: $($e.FullPath)"
}
1.创建 FileSystemWatcher 对象
$watcher = New-Object System.IO.FileSystemWatcher
这一行使用New-ObjectPowerShell 命令来创建一个System.IO.FileSystemWatcher的新实例。FileSystemWatcher类用来监听文件系统的变化事件。
2.设置监视的目录路径
$watcher.Path = "C:\YourPath"
这一行设置FileSystemWatcher实例监视的路径。这里"C:\YourPath"应该被替换为你希望监视的实际目录路径。
3.包括子目录
$watcher.IncludeSubdirectories = $true
此设置指示FileSystemWatcher不仅监视指定的目录,还监视其所有子目录中的文件更改。这是通过将IncludeSubdirectories属性设置为true来实现的。
4.启用事件通知
$watcher.EnableRaisingEvents = $true
这行代码激活FileSystemWatcher的事件通知功能。仅当EnableRaisingEvents设置为true时,FileSystemWatcher才会在指定的目录中监视文件变动并触发事件。
5.注册事件处理程序
Register-ObjectEvent $watcher "Created" -Action {
param($sender, $e)
Write-Host "File created: $($e.FullPath)"
}
这部分代码注册一个事件处理程序,当Created事件发生时触发。Created事件在文件被创建在监视的目录中时发生。
-
param($sender, $e):这是事件处理器的参数,其中$sender是引发事件的对象,而$e是包含事件数据的对象。对于FileSystemWatcher事件,$e将包含有关发生的文件更改的信息,如文件路径。 -
Write-Host "File created: $($e.FullPath)":这行命令输出被创建文件的路径。$e.FullPath提供了新创建文件的完整路径。
0x04使用 Runspaces 提高脚本性能
Runspaces 允许并行执行任务,适合执行多任务处理:
$runspacePool = [runspacefactory]::CreateRunspacePool(1, 5)
$runspacePool.Open()
$powershell = [powershell]::Create().AddScript({
param($param)
Start-Sleep -Seconds $param
"Slept for $param seconds"
}).AddArgument(3)
$powershell.RunspacePool = $runspacePool
$handle = $powershell.BeginInvoke()
1.创建 Runspace 池
$runspacePool = [runspacefactory]::CreateRunspacePool(1, 5)
$runspacePool.Open()
-
第一行使用
.NET类库中的runspacefactory的CreateRunspacePool静态方法创建一个 Runspace 池。这个方法接受两个参数,分别是池中最小和最大的 Runspace 数量。这里设定的是池中至少有1个 Runspace,最多有5个 Runspace。 -
第二行调用
Open()方法开启 Runspace 池,使其准备好接受任务。
2.创建 PowerShell 实例并添加脚本
$powershell = [powershell]::Create().AddScript({
param($param)
Start-Sleep -Seconds $param
"Slept for $param seconds"
}).AddArgument(3)
-
[powershell]::Create()创建一个新的 PowerShell 实例。 -
AddScript({})方法添加一个脚本块到这个 PowerShell 实例。这个脚本块接受一个参数$param,然后使脚本休眠$param秒,最后输出一个字符串显示休眠了多少秒。这里脚本通过{}定义了一个匿名函数。 -
AddArgument(3)方法向脚本块提供实际参数值3,这意味着脚本将使程序休眠3秒。
3.将 PowerShell 实例分配到 Runspace 池并异步执行
$powershell.RunspacePool = $runspacePool
$handle = $powershell.BeginInvoke()
-
$powershell.RunspacePool = $runspacePool这行代码将之前创建的 PowerShell 实例与 Runspace 池关联起来。这样,这个 PowerShell 实例就可以使用 Runspace 池中的一个 Runspace 来执行。 -
$handle = $powershell.BeginInvoke()开始异步执行 PowerShell 实例中的脚本。BeginInvoke()方法开始异步执行,并返回一个 handle(句柄),这个句柄可以被用来监控脚本的执行状态或获取执行结果。
应用场景
1.网络扫描
$runspacePool = [runspacefactory]::CreateRunspacePool(1, 10) # 创建含有10个Runspace的池
$runspacePool.Open()
$scriptBlock = {
param($ip)
Test-Connection -ComputerName $ip -Count 1 -Quiet
}
$ips = "192.168.200.1", "192.168.200.2", "192.168.200.3", "192.168.200.4" # 要扫描的IP列表
foreach ($ip in $ips) {
$powershell = [powershell]::Create().AddScript($scriptBlock).AddArgument($ip)
$powershell.RunspacePool = $runspacePool
$handle = $powershell.BeginInvoke()
# 可以在这里收集和处理每个任务的结果
}
2.异步数据收集
$runspacePool = [runspacefactory]::CreateRunspacePool(1, 5)
$runspacePool.Open()
$commands = @(
"Get-EventLog -LogName Security",
"Get-WmiObject -Class Win32_NetworkAdapterConfiguration",
"Get-Service"
)
foreach ($cmd in $commands) {
$powershell = [powershell]::Create().AddScript($cmd)
$powershell.RunspacePool = $runspacePool
$handle = $powershell.BeginInvoke()
# 处理每个命令的输出
}
结语
本文介绍了几种高级 PowerShell 技术在网络安全测试中的应用,展示了如何利用这些工具进行信息收集、网络监控、系统监控以及并行处理。渗透测试者可以根据自己的需求选择合适的技术,提高测试的效率和深度。
4A评测 - 免责申明
本站提供的一切软件、教程和内容信息仅限用于学习和研究目的。
不得将上述内容用于商业或者非法用途,否则一切后果请用户自负。
本站信息来自网络,版权争议与本站无关。您必须在下载后的24个小时之内,从您的电脑或手机中彻底删除上述内容。
如果您喜欢该程序,请支持正版,购买注册,得到更好的正版服务。如有侵权请邮件与我们联系处理。敬请谅解!
程序来源网络,不确保不包含木马病毒等危险内容,请在确保安全的情况下或使用虚拟机使用。
侵权违规投诉邮箱:4ablog168#gmail.com(#换成@)


